Introduction
Here’s something most people don’t realize until they’re sitting in the chair: the wrist has almost no muscle padding, which is exactly why a wings tattoo for wrist placement hurts more than the same design on your shoulder, but also why it heals into some of the crispest linework you’ll see on skin. It’s a small canvas with a big reputation.
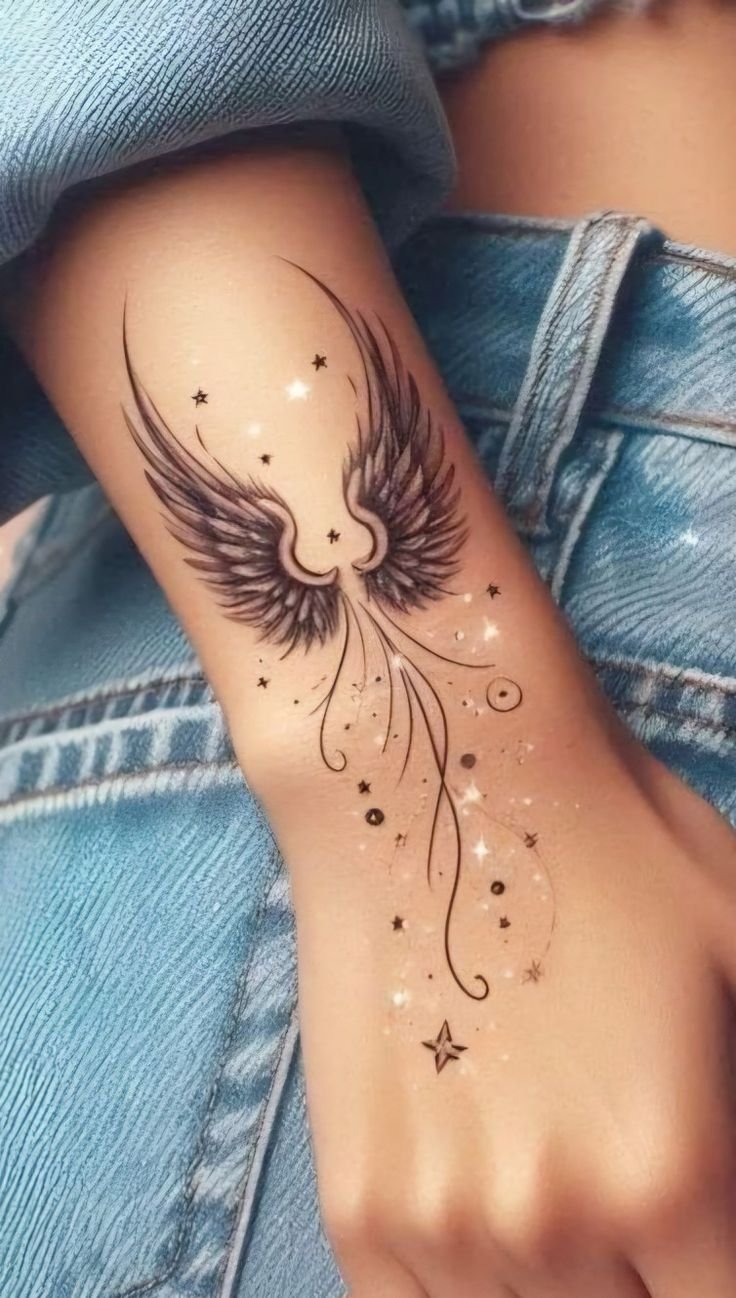
If you’ve been scrolling reference photos for weeks trying to figure out whether a tiny wing on the inner wrist or a fuller pair wrapped around the outer wrist actually works for your skin tone, your job, and your pain tolerance, you’re in the right place. This guide walks through real placement options, sizing, pain and healing realities, and design variations, including the small wings tattoo wrist look that’s dominating minimalist tattoo boards right now.
Key Takeaways:
- Wrist placement changes both pain level and how fast the design fades, know this before you book
- Inner wrist and outer wrist wings age differently; we break down which lasts longer
- Small wings tattoo wrist designs under 2 inches keep detail crisp for years
- Matching wing tattoos work best when the artist mirrors, not duplicates, each wing
- Realistic pricing ranges and a framework for judging whether a design will still look good in five years
Let’s map out exactly where to start.
Table of Contents
- Why the Wrist Works (and Where It Doesn’t) for Wing Designs
- Placement Options for a Wings Tattoo on the Wrist
- Design Styles: From Angel Wings to Minimalist Line Wings
- Pain, Pricing, and What Actually Happens During the Session
- Healing Timeline and Aftercare for Wrist Skin
- Comparison: Top Wrist Wing Styles at a Glance
- FAQ: Wings Tattoo for Wrist
Why the Wrist Works (and Where It Doesn’t) for Wing Designs
Quick Answer: The wrist suits small, symmetrical wing designs because the flat surface reads clearly at a glance, but it’s a poor fit for large, highly shaded wing art that needs room to breathe.
A wings tattoo for wrist placement lives or dies on scale. The wrist circumference on most adults runs somewhere between 5.5 and 7 inches, which sounds like plenty until you try to fit two fully feathered wings with individual barb detail into that space. Detail that dense just clogs into a gray smudge within a couple of years.
Wing tattoo scaling is defined as the practice of matching a design’s line density and shading complexity to the size of the body part it’s placed on, so the tattoo still reads clearly after natural skin aging and ink migration.
Artists who specialize in small-format work will usually simplify a wing reference down to three or four primary feather rows instead of the eight or nine you’d see in a back-piece version. Honestly, that simplification is the whole trick, and it’s the part a lot of first-timers skip when they bring in a Pinterest photo of a massive back tattoo and ask for it “just smaller.”
The wrist’s anatomy problem
The wrist bends, a lot, hundreds of times a day. That constant flexing is why linework on the inner wrist crease specifically tends to blur faster than ink on the flatter outer wrist.
Where wrist wings hold up best
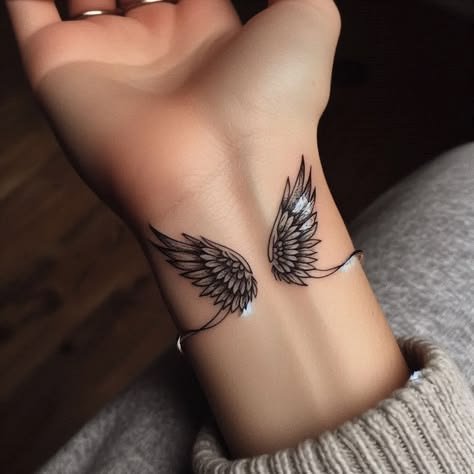
Wings placed slightly above the wrist bone, angled toward the forearm, get less flex exposure and tend to hold sharper edges longer.
Placement Options for a Wings Tattoo on the Wrist
There are really four zones people mean when they say “wrist,” and mixing them up is the single biggest reason someone ends up disappointed with a reference photo that didn’t translate.
- Inner wrist, centered – the most visible spot when your arm is relaxed at your side, but also the highest-flex, highest-pain zone.
- Outer wrist, top-facing – what you see when you look down at your own arm; heals a bit better since there’s more flat surface.
- Wrapping wrist band – the wing extends partway around the circumference, common for the wrist wings tattoo style where one wing sits on each side of the wrist bone.
- Side wrist, along the radius bone – closer to the thumb side, less visible in photos but genuinely one of the least painful wrist zones.
Pro Tip: If you work in an environment with a strict dress code, ask your artist to mock the design up on your actual wrist in the exact position your watch or sleeve would cover it before the needle ever touches skin. Some artists will do this with washable marker and have you wear it for a few days before committing, since a placement that looks fine sitting still in the chair can peek out from under a cuff the moment you move your arm at your desk.
Self-contained Q&A: does placement affect how the design looks over time?
Yes, placement directly affects longevity. Skin over the inner wrist crease folds constantly, which accelerates line spread, while the flatter outer wrist and side wrist areas keep crisp edges for a longer stretch of years.
Design Styles: From Angel Wings to Minimalist Line Wings
An angel wing wrist tattoo is a specific sub-style within wrist wing designs, generally depicting a feathered wing shape with religious or memorial symbolism, as opposed to purely decorative or abstract wing outlines.
Below are the design families people actually ask for, based on the reference categories tattoo shops report seeing most often for wrist bookings.
Single line wing
One continuous line, no shading, no fill. This is the go-to for a first tattoo because it’s fast, cheap, and forgiving if you decide to add to it later. Sessions typically run 20 to 40 minutes.
Small wings tattoo wrist, dotted style
Feather detail rendered in fine dot clusters instead of solid shading. It reads as delicate from a distance but takes more needle time than a straight line because of the stippling technique.
Matching wings tattoo wrist duo
This is where two people, often close friends, siblings, or a couple, each get one wing so the pair only “completes” when their wrists are held together. Matching wing tattoos are defined as a two-person tattoo set where each half is designed to visually connect only when the wearers position their tattoos next to each other.
Pro Tip: For a matching wings tattoo wrist duo, ask the artist to draw both halves on paper first and hold them together before transferring to skin, since even a 5-degree angle mismatch between the two wings will throw off the illusion once they’re inked.
Realistic feather-texture wing
Fuller shading with individual feather barbs. Genuinely stunning when done well, but it needs more real estate than the wrist typically offers, so most artists cap this style at around 3 to 4 inches and steer larger requests toward the forearm instead.
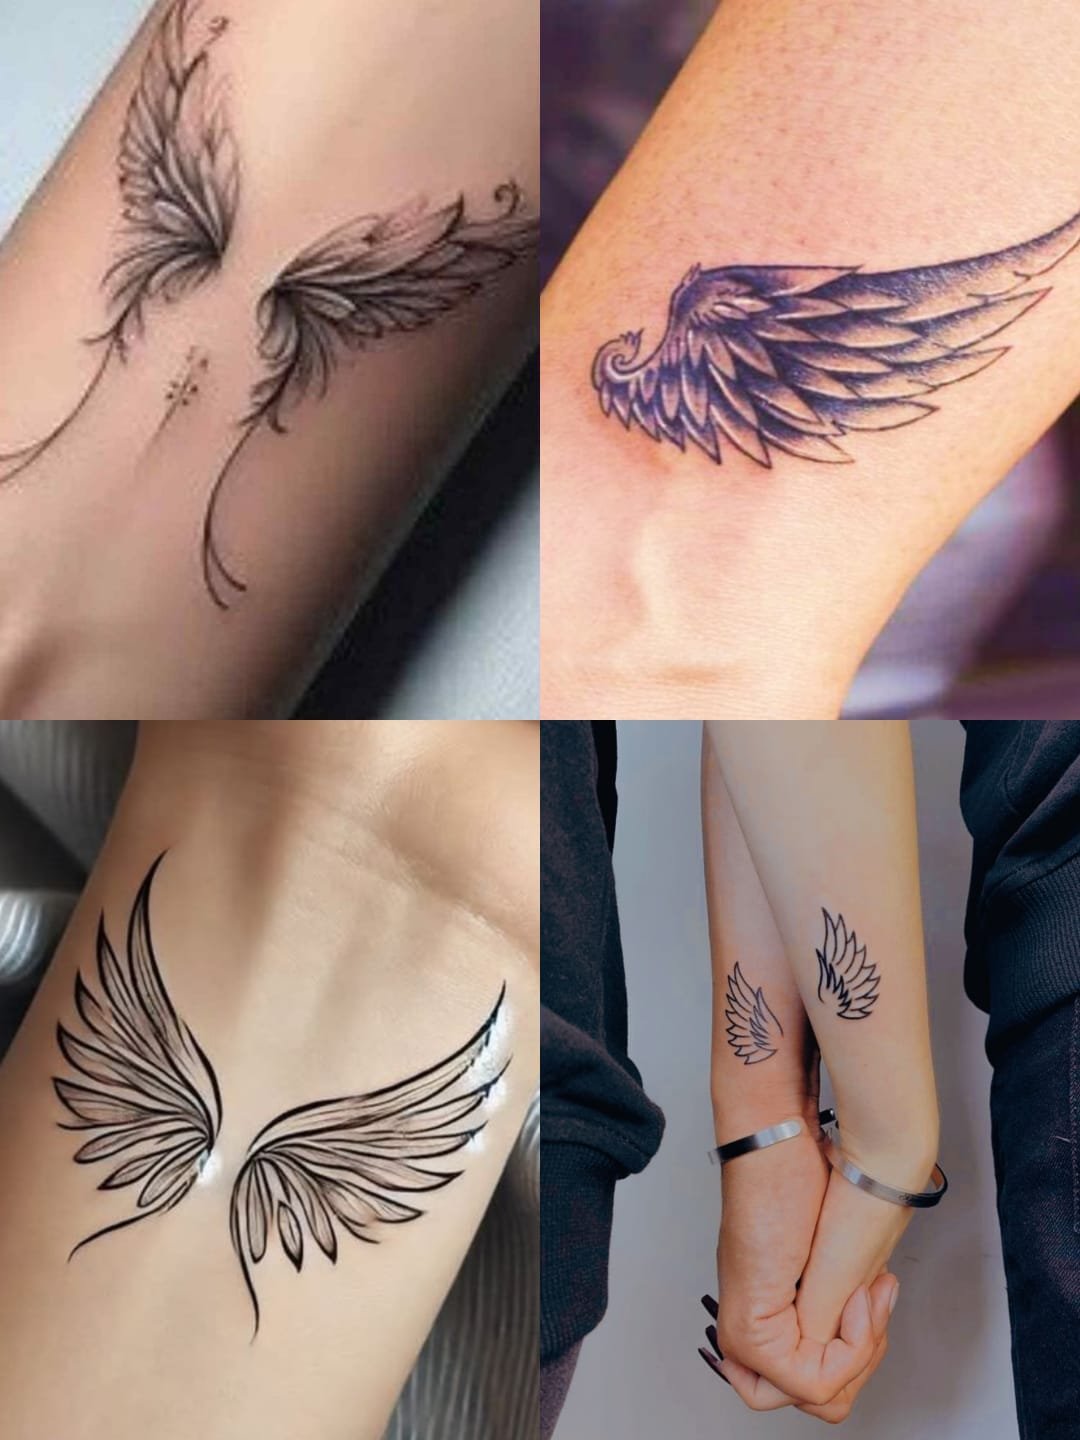
For the fuller picture on symbolism, style variations, and placements beyond the wrist, see our complete small angel wings tattoo guide.
Pain, Pricing, and What Actually Happens During the Session
Quick Answer: Wrist tattoos sit in the moderate pain range, thin skin over bone and tendons keeps it noticeable, but it isn’t one of the more extreme placements, and a small wing design typically costs between $80 and $250 depending on detail and studio rates.
Pain tolerance is personal, but published tattoo pain charts consistently rate the wrist around a 5 out of 10, moderate pain, on par with the inner bicep and well below high-pain zones like the ribs or sternum, which sit at 7 to 10 (Hyper Inkers, 2026). That rating comes down to thin skin sitting close to tendons, bone, and the radial artery. The inner wrist crease specifically tends to feel more intense than the outer or side wrist, since it bends more and has thinner skin.
Numbered session process
- Consultation and stencil placement – the artist sizes the design to your wrist and applies a transfer stencil so you can approve exact positioning before ink touches skin.
- Skin prep – the area is shaved if needed and cleaned with an antiseptic solution.
- Outline pass – thin needle groupings trace the wing’s border first.
- Detail and shading pass (if applicable) – feather lines or dot work get filled in.
- Cleaning and bandaging – excess ink and plasma are wiped, then a protective covering is applied.
- Aftercare walkthrough – the artist reviews cleaning and moisturizing instructions before you leave.
What a simple session typically looks like
Here’s a concrete illustration of the “keep it simple” advice above: a 2.5-inch single-wing outline on the outer wrist, with no shading, sits at the low end of both time and cost. A design that size typically wraps up in well under an hour and stays within the $80 to $150 range this guide’s comparison table lists for single line wings. Because there’s no dense shading to hold onto, there’s also less for uneven peeling to damage, which is the practical payoff of matching a design to the placement instead of shrinking down a bigger reference.
Healing Timeline and Aftercare for Wrist Skin
Wrist skin follows the same broad healing stages as most placements, but tattoo studios specifically flag joints and other high-flex spots as needing more time than flatter areas, since the constant bending stretches skin that’s still trying to close (Hyper Inkers, 2025).
- Days 1 to 3: redness, mild swelling, and some plasma weeping are normal as the initial inflammatory response kicks in
- Days 4 through roughly week 2 to 3: peeling and itching set in, avoid picking even though the itch is real
- Weeks 2 to 3 through month 1: the surface looks settled but can still seem a little dull before true color saturation shows
- Months 1 to 3, sometimes up to 6: the deeper skin layer keeps remodeling out of sight, which is why fine linework on a wrist piece can keep sharpening even after it looks “done” on the surface
Pro Tip: Skip the wristwatch and bracelets entirely for the first two weeks, not just during workouts. Friction from a watch band against fresh wrist ink is one of the more common causes of patchy healing that artists see in follow-up visits.
Comparison: Top Wrist Wing Styles at a Glance
Wings Tattoo for Wrist Comparison: Top Options at a Glance
| Option | Key Feature | Best For | Price Range | Pain Level (1-10) |
|---|---|---|---|---|
| Single line wing | Minimal, one continuous outline | First-timers, minimalists | $80-$150 | 5 |
| Small wings tattoo wrist (dotted) | Fine stippled feather texture | Delicate, feminine styling | $120-$220 | 5 |
| Angel wing wrist tattoo | Religious or memorial symbolism | Meaningful, tribute pieces | $100-$250 | 5 |
| Matching wings tattoo wrist duo | Two-piece design that connects | Friends, siblings, couples | $80-$180 per person | 5 |
| Realistic feather wing | Full shading, individual barbs | Detail lovers with forearm space to spare | $200-$400 | 5-6 |
Pain levels reflect the wrist’s general moderate rating on published tattoo pain charts (Hyper Inkers, 2026); longer, more detailed sessions can feel more taxing simply because you’re sitting through more of that same sensation, not because the location itself hurts more.
Our pick: For most first-time clients, the single line wing or a simplified small wings tattoo wrist design wins out. It costs less, heals faster because there’s less trauma to the skin, and it still looks intentional years down the line instead of turning into a shaded blob the way overly detailed small tattoos often do.
FAQ: Wings Tattoo for Wrist
What is a wings tattoo for wrist? A wings tattoo for wrist is a wing-shaped design, either a single wing or a symmetrical pair, inked specifically on the wrist rather than the back, chest, or shoulder blade. Because the wrist offers a small, flat-ish canvas, these designs are almost always simplified compared to larger wing tattoos, favoring clean linework or light shading over dense feather detail.
How does a small wings tattoo wrist design hold up over time? It holds up well as long as the linework stays proportionate to the space. Wrist skin bends constantly, so a design with too much fine detail will blur faster than the same design on a flatter body part, which is why most artists recommend simpler outlines for this specific placement.
Why is the wrist considered a moderately painful spot for a wings tattoo? The wrist has thin skin with bone, tendons, and an artery sitting close to the surface, with very little muscle to cushion the needle. That combination puts it in the moderate pain band on published tattoo pain charts, on par with the inner bicep and above fleshier spots like the outer thigh or forearm, but below high-pain areas like the ribs or sternum.
Is a wings tattoo for wrist worth it if I have a strict workplace dress code? It can be, if you plan the placement carefully. Positioning the wing on the outer or side wrist, where a watch or long sleeve naturally covers it, lets you keep the tattoo while staying within most dress codes.
What’s the best way to pick a design that won’t look dated in a few years? Go simple. Clean single-line or lightly dotted wing designs age better than trend-driven styles like heavily shaded realism, because there’s less fine detail for skin aging and sun exposure to degrade.
How much does a wings tattoo for wrist typically cost? Most simple wrist wing designs run between $80 and $250, depending on the studio’s hourly rate, the artist’s experience level, and how much shading or detail the design includes.
How does a wrist wings tattoo compare to a forearm placement? The forearm gives you more room for detail and generally heals with less line distortion since there’s more flat skin and less constant bending. The wrist wins on visibility and intimacy of the placement but trades off some longevity of fine detail.
My wrist tattoo is fading unevenly, what should I do? Uneven fading is common on wrist placements because of the flex and friction from daily wrist movement. Book a touch-up consultation with your original artist, usually free or low-cost within the first year, rather than trying to fix it yourself.
Conclusion
A wings tattoo for wrist placement rewards restraint. The three things worth remembering: keep the design scaled down to match the wrist’s small, high-flex surface, choose outer or side wrist positioning if longevity matters more to you than maximum visibility, and simplify shading wherever possible since fine detail is what fades first on this particular spot.
Ready to move forward? Here’s what to do in the next 10 minutes:
- Screenshot 2 to 3 reference designs from this guide’s style categories that matched what you had in mind
- Measure your actual wrist circumference so you walk into a consultation with a realistic size expectation
- Book a consultation specifically to test stencil placement before committing to ink
Author Bio
Written by a beauty and body-art content specialist who has spent years covering tattoo trends, aftercare science, and placement guides for fashion and lifestyle audiences. Research for this piece draws on published pain-scale and aftercare data from practicing tattoo studios, cited below. Not a medical professional; always consult a licensed tattoo artist and, where relevant, a dermatologist before booking.
Last Updated: August 2026 Disclosure: This article contains no sponsored placements or affiliate links. Fact-checked by: Editorial review team
References
- Hyper Inkers Tattoo Studio, “Tattoo Pain Chart: Pain Levels and the Most and Least Painful Areas” (2026). Source for the wrist’s moderate (5/10) pain rating and its anatomical basis.
- Hyper Inkers Tattoo Studio, “Tattoo Healing Stages Day By Day: A Comprehensive Guide” (2025). Source for the healing-stage timeline and the note on high-flex placements needing longer to heal.
- Pricing ranges in this guide are general estimates based on typical small-format tattoo rates; they are not drawn from a specific published source and will vary by studio, artist experience, and region. Confirm current pricing directly with your chosen shop.